You know your broken tooth doesn’t cut it anymore, so you clearly need a dental crown. You know the benefits of this restoration: they’re durable and natural-looking and can protect and even save teeth in some instances. But maybe you’re still a bit apprehensive about your upcoming appointment to receive a crown. You’ve never done this before and you don’t know how it’s going to go or what the end result may look like. To help you rest easy, here is a breakdown of what the dentist does to prepare you for a crown restoration.
What is a Dental Crown?
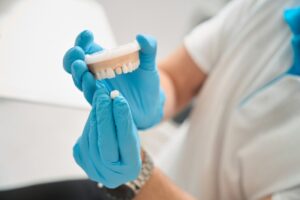
A crown looks like a hollowed-out tooth. It is, in fact, a cap that is fitted over a tooth that’s suffered damage like cracks or large cavities. Generally, ceramic crowns are preferred nowadays because of their realistic appearance.
Step 1: Examination
The day has come, and you’re headed to the dentist! Let’s go through the steps to help you understand what will happen.
The first thing the dentist will do is examine the tooth and take X-rays to see the extent of the damage. They’re looking for a strong enough jawbone, root, and tooth structure to support a crown.
Step 2: Numbing
To keep you comfortable and relaxed, the dentist will apply a local anesthetic to the affected area to numb you to any sensations before they get to work. If necessary, they’ll administer more as the procedure goes on, so you don’t feel any pain.
Step 3: Preparing the Tooth
To prep the tooth, any existing decay or damage needs to be drilled out first. The reason a crown is necessary in the first place is because the decay is too great to place a filling.
Once the decay or weak structure has been removed, your dentist will shave the tooth down into a stub-like shape that will allow the crown to cap right on top of it.
Step 4: Impressions
Your dentist will now be ready to take impressions of your bite that they can send away to a lab to make your permanent crown. If your dentist has advanced technology, they’ll take digital impressions. These are preferred to putty impressions as they’re more comfortable and accurate.
Step 5: Temporary Fix
While you wait a week or two to get your permanent restoration, the dentist will outfit your tooth with a temporary crown in the meantime. Patients should exercise caution with their temporary crown; it is not designed to stay there very long. Instead, it’s meant to protect your vulnerable tooth until placement of the final product.
Step 6: Permanent Crown
Once the lab finishes manufacturing it, you’ll go to your follow-up appointment for your permanent crown to be placed!
Your dentist will apply a uniform layer of dental cement to the inside of the restoration, then carefully fit it onto your tooth and scrape away any excess material.
You’ve got a new, functioning, beautiful crown!
Now that you understand the process, you can head into your upcoming appointment to receive your crown with confidence knowing your smile is about to be as good as new!
About the Author
Dr. Swathi Atluri earned her first dental degree in India before moving to the United States and completing her Doctor of Dental Surgery degree at the New York University College of Dentistry in 2011. She keeps up to date through continuing education courses every year in subjects like root canal treatment, dental implant restoration, and Invisalign. Dr. Atluri is also a member of both the American Dental Association and the Texas Dental Association. If you’d like to protect and enhance damaged teeth with dental crown restoration, schedule an appointment with our Arlington office by calling (682) 452-1150 or by visiting our website.
